


505-6660
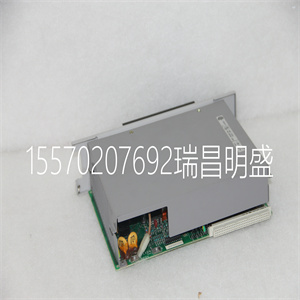
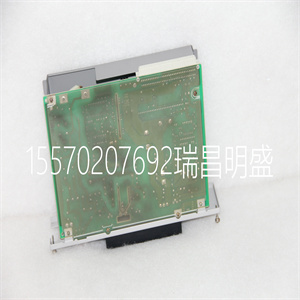
锂离子电池组件安装在SB822装置内。为了防止问题
你需要定期收费。
电池组规格:
•类型:可充电锂离子,3.75V 2.3Ah
•尺寸:棱柱形14.5x43x50 mm
•锂当量含量:0.8克
更换SB822可再充电外部电池单元中的电池
要更换锂离子电池:
1.断开TK821V020电缆连接器。
2.断开24V电源电缆连接器
3.从DIN导轨上松开SB822装置。
4.继续操作前,将正确接地的ESD腕带连接到手腕上。
5.小心地拆下SB822装置盖并识别电池组。
6.小心地从PCB上断开电池连接器。
7.小心地拆下电池组。
8.插入新电池并连接。重新组装与拆卸相反。
9.安装装置。
10.以经批准的方式处置磨损的电池包。
机组在线更换第5节维护
198 3BSE036351-510 A
机组在线更换
在线更换需要在控制器中添加或删除单元,而无需
干扰正在运行的应用程序的执行。单元连接到
CEX总线和电气模块总线(S800 I/O)。
CEX总线
通信接口(CI8xx)可以在线移除或替换。
适用限制,请参阅
每个接口的安装部分
以及附录A,硬件单元。
不得在线更换CI8xx(TP8xx)的基板。
模块总线
S800 I/O单元可以在线移除或更换。
不得在线更换模块终端装置(MTU)
冗余CPU
处理器单元可以在线拆卸或更换
(见下页)
可以在线移除或更换RCU链路电缆。
然而
应用;您不能更换RCU
在4.1之前的版本中联机链接电缆
软件版本。更多
有关详细信息,请参阅给出的说明
在交换缺陷RCU链路时
第202页在线电缆。
不允许在带电和运行状态下操作CEX总线基板
系统在更换或拆除基板之前,该基板上的所有CEX模块
必须删除段。
第5节无BC810冗余配置的CPU维护交换
3BSE036351-510 A 199
以冗余配置交换CPU,无需
BC810
按照以下步骤交换暂停的处理器单元:
1.断开电源插座与处理器单元的连接。
2.断开RCU链路电缆和光学模块总线电缆与主机的连接
要交换的处理器单元。
3.如果使用PM86x,则使用一字螺丝刀释放两个弹簧加载的螺钉
拧下处理器单元盖上的固定螺钉,然后小心地拆下
处理器单元。如果使用PM891,请小心地拆下装置。
4.安装新的处理器单元(已安装正确的固件)
并拧紧螺钉。
5.将电源插座重新连接到新处理器单元。
6.重新连接光学模块总线和RCU链路电缆。
7.按下更换的处理器单元上的INIT按钮。
对于PM86x,在运行期间只能更换CPU单元,而不能更换CPU单元
相关基板。拆下底板会危及设备的功能
CEX总线接口,如有。
对于PM891,在运行期间不能更换整个装置,除非
危及CEX总线接口的功能(如有)
更换前,新CPU必须加载正确的固件,如中所示
现有CPU。
您无需完全断开RCU链路电缆即可:
交换暂停的处理器单元。仅断开备份CPU的连接,从而保持
连接到主CPU的RCU链路电缆(现在在单个CPU中运行)
状态)。但是,如果必须更换RCU链路电缆,请参阅更换电缆
第202页的缺陷RCU链路电缆在线。
电源关闭时,新处理器单元的F(ault)指示灯暂时点亮
电源已连接。这不是故障指示。
按下INIT按钮将启动重新启动,以保持新功能
处理器单元处于冗余模式。
与BC810交换冗余配置的CPU第5节维护
200 3BSE036351-510 A
8.遵守启动程序,确保达到双模式,即:,
两个处理器单元上的双LED均亮起。
与BC810交换冗余配置的CPU
如果BC810由外部电源供电,则整个CPU与
底板,可在操作期间更换。
按照以下步骤交换暂停的处理器单元
1.断开电源插座与处理器单元的连接。
2.断开RCU链路电缆和光学模块总线电缆与主机的连接
要交换的处理器单元。
3.断开控制网络电缆。
4.将锁定装置旋转至装置底板上的滑动位置(2),
参见第69页的图17。
在同步过程中,新处理器单元从
运行处理器单元。
重复使用从系统内的冗余配置中替换的CPU模块
同一控制网络
505-6660
505-6660
The Li-Ion battery package is mounted inside the SB822 unit. To prevent problems you need to charge it on a regular basis. Specification for the battery package: • Type: Rechargeable Lithium-Ion, 3.75V 2.3 Ah • Size: Prismatic 14.5x43x50 mm • Lithium equivalent content: 0.8 g Replacing the Battery in an SB822 Rechargable External Battery Unit To replace the Li-Ion battery: 1. Disconnect the TK821V020 cable connector. 2. Disconnect the 24V supply cable connector 3. Release the SB822 unit from the DIN-rail. 4. Attach a properly grounded ESD wrist strap to your wrist before you proceed. 5. Carefully remove the SB822 unit cover and identify the battery package. 6. Carefully disconnect the battery connector from the PCB. 7. Carefully remove the battery package. 8. Insert the new battery and connect. Reassemble is reverse from disassemble. 9. Install the unit. 10. Dispose of the worn battery package in an approved manner. Online Replacement of Unit Section 5 Maintenance 198 3BSE036351-510 A Online Replacement of Unit Replacement online entails adding or removing units in a controller without disturbing the execution of the running application program. Units are connected to the CEX-Bus and the electrical ModuleBus (S800 I/O). CEX-Bus Communication interfaces (CI8xx) Can be removed or replaced online. Restrictions apply, refer to the installation section for each interface and to Appendix A, Hardware Units. Baseplates for CI8xx (TP8xx) Must not be replaced online. ModuleBus S800 I/O units Can be removed or replaced online. Module Terminal Units (MTUs) Must not be replaced online Redundant CPUs Processor unit Can be removed or replaced online (see the next following pages) RCU Link Cables Can be removed or replaced online. However, the following restriction applies; you cannot replace the RCU link cable online in a previous than 4.1 software version. For more information, see the instructions given in Exchanging a Defect RCU Link Cables Online on page 202. It is not allowed to manipulate CEX bus baseplates in a powered and running system. Before changing or removing a baseplate, all CEX modules on that segment must be removed. Section 5 Maintenance Exchange of CPU in Redundant Configuration without BC810 3BSE036351-510 A 199 Exchange of CPU in Redundant Configuration without BC810 Follow the steps below to exchange a halted processor unit: 1. Disconnect the Power Supply Socket from the processor unit. 2. Disconnect the RCU link cables and optical ModuleBus cable from the processor unit to be exchanged. 3. If PM86x is used, use a blade screwdriver to release the two spring-loaded captive screws on the processor unit cover, and then carefully remove the processor unit. If PM891 is used, carefully remove the unit. 4. Fit the new processor unit (which already has the correct firmware installed) and tighten the screws. 5. Reconnect the Power Supply Socket to the new processor unit. 6. Reconnect the optical ModuleBus and RCU Link Cable. 7. Press the INIT push button on the replaced processor unit. For PM86x, only the CPU unit can be exchanged during operation, and not the associated baseplate. Removing the baseplate jeopardizes the functioning of CEX-bus interfaces, if any. For PM891, the entire unit cannot be exchanged during operation, without jeopardizing the functioning of CEX-bus interfaces, if any Before replacing, the new CPU must be loaded with the correct firmware as in the existing CPU. You do not have to disconnect the RCU link cables completely in order to exchange a halted processor unit. Disconnect only the backup CPU, thus keeping the RCU link cables connected to the primary CPU (now running in a single state). However, if you must replace the RCU link cables, see Exchanging a Defect RCU Link Cables Online on page 202. The F(ault) LED of the new processor unit is temporarily lit when the power supply is connected. This is not an indication of fault. Pressing the INIT button initiates the restart that is required to keep the new processor unit in redundant mode. Exchange of CPU in Redundant Configuration with BC810 Section 5 Maintenance 200 3BSE036351-510 A 8. Observe the startup procedure and make sure that Dual mode is reached, that is, the Dual LED is lit on both processor units. Exchange of CPU in Redundant Configuration with BC810 If the BC810 is powered from an external power source, the entire CPU, with baseplate, can be replaced during operation. Follow the steps below to exchange a halted processor unit 1. Disconnect the Power Supply Socket from the processor unit. 2. Disconnect the RCU Link Cable and optical ModuleBus cable from the processor unit to be exchanged. 3. Disconnect the Control Network cables. 4. Rotate the locking device to the SLIDE position (2) on the unit baseplate, see Figure 17 on page 69. During synchronization, the new processor unit inherits the IP address from the running processor unit. Reuse of CPU modules replaced from redundant configurations within the same control network, might cause control network problems due to the MAC and IP address handling. See MAC and IP Address Handling in Redundant Configuration on page 49. Such reuse should not be fulfilled unless both the replaced module and the module previously acting together with it in redundant configuration are known to be restored from the previous mutual address swap. It is recommended to set up an IP-config session and use the “Restore factory settings” option subsequently followed by reassignment of the IP address or assignment of a new IP address. Before replacing, the new CPU must be loaded with the correct firmware as in the existing CPU. Do not, under any circumstances, remove the RCU Link Cable from the primary CPU now running in a single sta
Copyright ©2019-2022 瑞昌明盛自动化设备有限公司 版权所有 赣ICP备2021006016号


