
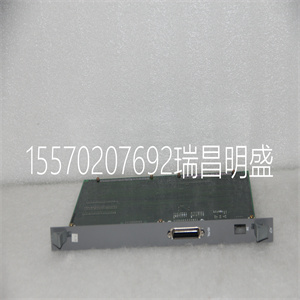


E5CN
主复位和升级跳线
JP6包含两个跳线,MRST和UPGRD。MRST跳线是主复位跳线。什么时候
连接MRST后,控制器将在PC通电或复位时执行主复位
投入越来越少。每当控制器有主复位时,所有程序、数组、变量和
存储在EEPROM中的运动控制参数将被擦除。
UPGRD跳线使用户能够无条件更新控制器的固件。这件毛衣
当控制器正常运行时,固件更新不需要,但可能需要
在损坏的EEPROM的情况下。EEPROM损坏不应发生,但是,如果
固件更新期间出现电源故障。如果发生EEPROM损坏,您的控制器可能会损坏
操作不正常。在这种情况下,请安装UPGRD跳线并在上使用更新固件功能
Galil终端重新加载系统固件。
步进电机跳线
对于将用于步进电机操作的每个轴,对应的步进模式(SM)
必须连接跳线。步进模式跳线标记为JP2,直接位于GL1800 IC旁边(这是板上大的IC-请参阅DMC-18x2的示意图)。个人
跳线标记为SMX、SMY、SMZ和SMW,并将控制器配置为“步进电机”
安装时对应的X、Y、Z和W轴。标有OPT的跳线供Galil使用
仅限技术人员。
步骤3.安装通信软件
在PC中安装DMC-18x2控制器之前,请先安装Galil通信软件和驱动程序
应该加载。在安装卡之前安装Galil软件将允许大多数操作
系统自动将控制器安装到Windows和Galil注册表中。
使用Win98SE、ME、NT4.0、2000和XP
将Galil软件产品CD-ROM安装到CD驱动器中。一个Galil.htm页面应该
自动显示软件产品的链接。选择“DMC智能终端”,然后单击
“安装…”按照概述的安装步骤进行。
使用DOS:
使用Galil软件CD-ROM,访问www.galilmc.com/support/download2.html并按照
说明书
注:Galil软件也可从以下网站下载:http://www.galilmc.com/support/download.html
步骤4.在电脑中安装DMC-18x2
DMC-18x2直接安装在PCI扩展总线中。程序概述如下。
步骤A.确保电脑处于断电状态。
步骤B.拆下装置盖。
步骤C.移除覆盖DMC-18x2所在扩展总线槽的金属板
插入。
Artisan技术集团-质量仪器…保证|(888)88-SOURCE| www.artistg.com
DMC-18x2第2章入门•11
步骤D.将DMC-18x2卡插入扩展总线并用螺钉固定。
步骤E.将100针电缆连接到控制器卡。如果您使用的是Galil ICM-1900,
AMP-19X0或ICM-2900,此电缆连接到互连上的J2连接中
单元如果您没有使用Galil互连模块,则需要适当地
将电缆端接至系统组件,有关电缆插脚,请参阅附录。
打开计算机电源后,计算机应将DMC-18x2识别为新的
并将自动将设备安装到Windows和Galil注册表中。
步骤5.使用Galil软件建立通信
使用Win98SE、ME、NT4.0、2000和XP
当执行DMC智能终端时,如果您只有
注册表中的1个控制器条目。如果安装或注册了多个控制器,将出现提示
显示在可以通过高亮显示来选择控制器的位置。选择条目后,单击
在OK按钮上。如果与控制器建立通信,终端窗口将打开
并且将显示冒号提示。从终端的顶行,您可以向
控制器。命令语法将在后面的章节和命令参考中介绍。
如果与控制器通信不正常,程序将暂停3-15秒。
屏幕顶部将显示消息“状态:未与Galil运动控制器连接”,并且
将出现以下错误:“停止-无法与Galil控制器建立通信。
等待Galil控制器的响应时发生超时。“如果出现该消息,
您必须单击“确定”。如果无法与控制器通信,请联系Galil。
Dos用户:
从Galil软件CD安装DMCDO将安装程序DMCTERM,一个
交互式通信程序。运行DMCTERM时,您必须提供:
1) 通信地址
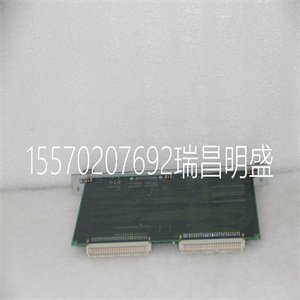
E5CN
E5CN
Master Reset and Upgrade Jumpers JP6 contains two jumpers, MRST and UPGRD. The MRST jumper is the Master Reset jumper. When MRST is connected, the controller will perform a master reset upon PC power up or upon the reset input going low. Whenever the controller has a master reset, all programs, arrays, variables, and motion control parameters stored in EEPROM will be ERASED. The UPGRD jumper enables the user to unconditionally update the controller’s firmware. This jumper is not necessary for firmware updates when the controller is operating normally, but may be necessary in cases of corrupted EEPROM. EEPROM corruption should never occur, however, it is possible if there is a power fault during a firmware update. If EEPROM corruption occurs, your controller may not operate properly. In this case, install the UPGRD Jumper and use the update firmware function on the Galil Terminal to re-load the system firmware. Stepper Motor Jumpers For each axis that will be used for stepper motor operation, the corresponding stepper mode (SM) jumper must be connected. The stepper mode jumpers, labeled JP2, are located directly beside the GL1800 IC (this is the largest IC on the board - see the diagram of the DMC-18x2). The individual jumpers are labeled SMX, SMY, SMZ, and SMW and configure the controller for ‘Stepper Motors’ for the corresponding X, Y, Z and W axes when installed. The jumper labeled, OPT, is for use by Galil technicians only. Step 3. Install the Communications Software Before installing the DMC-18x2 controller in the PC, Galil communications software and drivers should be loaded. Installing the Galil software prior to installing the card will allow most operating system to automatically install the controller into both the Windows and Galil registries. Using Win98SE, ME, NT4.0, 2000, and XP Install the Galil Software Products CD-ROM into your CD drive. A Galil .htm page should automatically appear with links to the software products. Select “DMC-Smart Terminal”, and click “Install…” Follow the installation procedure as outlined. Using DOS: Using the Galil Software CD-ROM, go to www.galilmc.com/support/download2.html and follow the instructions. Note: Galil software is also available for download at: http://www.galilmc.com/support/download.html Step 4. Install the DMC-18x2 in the PC The DMC-18x2 is installed directly into the PCI expansion bus. The procedure is outlined below. Step A. Make sure the PC is in the power-off condition. Step B. Remove unit cover. Step C. Remove the metal plate covering the expansion bus slot where the DMC-18x2 will be inserted. Artisan Technology Group - Quality Instrumentation ... Guaranteed | (888) 88-SOURCE | www.artisantg.com DMC-18x2 Chapter 2 Getting Started • 11 Step D. Insert DMC-18x2 card in the expansion bus and secure with screw. Step E. Attach 100-pin cable to your controller card. If you are using a Galil ICM-1900, AMP-19X0, or ICM-2900, this cable connects into the J2 connection on the interconnect module. If you are not using a Galil interconnect module, you will need to appropriately terminate the cable to your system components, see the appendix for cable pin outs. After turning on the power to the computer, your computer should recognize the DMC-18x2 as a new device and will automatically install the device into the Windows and Galil registries. Step 5. Establish Communication using Galil Software Using Win98SE, ME, NT4.0, 2000, and XP When DMC Smart Terminal is executed, it will automatically attempt communication if you have only 1 controller entry in the registry. If more than one controller is installed or registered, a prompt will appear where you can select the controller by highlighting it. Once the entry has been selected, click on the OK button. If communication is established with the controller, the terminal window will open and a colon prompt will be displayed. From the top line of the terminal, you can send commands to the controller. Command syntax is described in later sections and the Command Reference. If you are not properly communicating with the controller, the program will pause for 3-15 seconds. The top of the screen will display the message “Status: not connected with Galil motion controller” and the following error will appear: “STOP - Unable to establish communication with the Galil controller. A time-out occurred while waiting for a response from the Galil controller.” If this message appears, you must click OK. Contact Galil if you are unable to communicate with your controller. Dos Users: The installation of DMCDOS from the Galil software CD will install the program DMCTERM, an interactive communication program. When running DMCTERM, you will have to provide: 1) The communication address
Copyright ©2019-2022 瑞昌明盛自动化设备有限公司 版权所有 赣ICP备2021006016号


