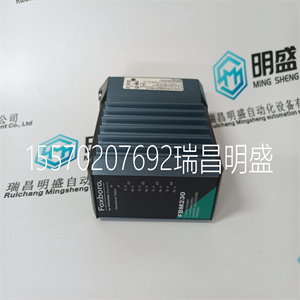


FBM230 P0926GU
本章包含用于定义应用程序的应用程序宏
一组参数。宏将一组参数更改为
新的预定义值。使用宏将对
手动编辑参数。
应用
本章包括以下应用程序:
1.HVAC默认值(对于典型的BMS[楼宇管理
系统]应用程序)
2.送风机
3.回风机
4.冷却塔风机
5.冷凝器
6.增压泵
7.泵交替
8.内部定时器
9.具有恒定速度的内部定时器
10.浮点
11.双设定点PID
12.具有恒定速度的双设定点PID
13.电子旁路(仅限美国)
14.手动控制。
ACH550-01用户手册
94应用程序宏和布线
选择应用程序宏
要选择应用程序宏,请执行以下步骤:
1.按MENU键进入菜单
主菜单。
2.选择具有以下特征的助手:
上/下键和
按回车键。
3.滚动至应用程序,然后
按SEL。
4.使用向上键选择宏/
向下键并按
保存。
5.如果您想使用
机械切换自动开关,按OK。如果
你不想使用它,
用向下键选择“否”
键,然后按OK。
为了能够使用
开关,EXT1(手动)启动
命令必须是
连接到DI1和EXT2
(自动)启动命令
DI6。
0A
0赫兹
0%
0
0.关闭0.0Hz
00:00菜单
参数
助手
更改标准杆数
退出00:00进入
关闭主菜单2
旋转马达
佣金驱动
应用
参考文献1和2
启动/停止控制
出口00:00 SEL
休息助理3
9902应用宏
标准杆数编辑
HVAC默认值
[1]
关
退出00:00保存
你想去吗
使用机械
自动切换开关?
对
不
00:00退出,好吗
别无选择
ACH550-01用户手册
应用程序宏和布线95
恢复默认值
要恢复默认出厂设置,请选择应用程序
宏是默认值。
ACH550-01用户手册
96应用程序宏和布线
1.HVAC默认值
HVAC默认应用程序宏用于典型的BMS
应用。
驱动器输入和输出的出厂设置配置为:
如97页的图所示。
在自动模式下使用直接速度参考时
速度基准必须连接到模拟输入1(AI1)
并且用数字输入1(DI1)给出启动命令。在里面
切换/断开模式、速度参考和起动
通过控制面板(操作员键盘)发出命令。
如果使用过程PI(D),则必须连接反馈信号
至模拟输入2(AI2)。默认情况下,设定点是从
控制面板,但也可以更改为模拟输入1。
工艺PI(D)必须通过以下方式进行调试和调整:
参数(组40:过程PID设置1)或使用PID
控制助理(推荐)。
ACH550-01用户手册
应用程序宏和布线97
1个SCR信号电缆屏蔽(屏幕)
2 AI1外部参考1:0(2)…10 V或0(4)…20 mA
3 AGND模拟输入电路公共
4 10V参考电压+10V直流电
5 AI2实际信号1:0(2)…10 V或0(4)…20 mA 3
6 AGND模拟输入电路公共
7 AO1输出频率:0(4)…20mA
8 AO2输出电流:0(4)…20mA
9 AGND模拟输出电路公共
10 24V辅助电压输出+24 V直流电
11 DI返回信号的接地公共线
12 DCOM数字输入通用于所有
13 DI1启动/停止:激活启动驱动器
14未使用DI2
15 DI3恒速1(1202段)1
16 DI4启动启用1:停用停止驱动器2
17未使用DI5
18未使用DI6
19 RO1C继电器输出1(1401段)
默认操作
就绪=>19连接到21
20 RO1A
21 RO1B
22 RO2C继电器输出2(1402段)
默认操作
运行=>22连接到24
23 RO2A
24 RO2B
25 RO3C继电器输出3(1403段)
默认操作
故障(-1)=>25连接到27
26 RO3A
27 RO3B
1如果激活PID,则不可用
2禁用/启用参数1608 3 AI2的传感器由外部供电(图中未显示)。请参阅制造商的
说明书要使用由驱动辅助电压输出提供的传感器,请参阅124页。
注意:只有在可能的保护功能(运行启用或启动启用1和2)下,驱动器才会启动
2) 通过I/O激活或通过参数禁用。
FBM230 P0926GU

FBM230 P0926GU
This chapter contains the application macros used for defining a group of parameters. Macros change a group of parameters to new, predefined values. Use macros to minimise the need for manual editing of parameters. Applications The following applications are included in this chapter: 1. HVAC default (for typical BMS [Building Management System] applications) 2. Supply fan 3. Return fan 4. Cooling tower fan 5. Condenser 6. Booster pump 7. Pump alternation 8. Internal timer 9. Internal timer with constant speeds 10. Floating point 11. Dual setpoint PID 12. Dual setpoint PID with constant speeds 13. E-bypass (USA only) 14. Hand control. ACH550-01 User's Manual 94 Application macros and wiring Selecting an application macro To select an application macro, follow these steps: 1 Press MENU to go to the main menu. 2 Select ASSISTANTS with the UP/DOWN keys and press ENTER. 3 Scroll to Application and press SEL. 4 Select a macro with the UP/ DOWN keys and press SAVE. 5 If you want to use the mechanical HAND-OFFAUTO switch, press OK. If you do not want to use it, select No with the DOWN key and then press OK. To be able to use the switch, EXT1 (HAND) Start command must be connected to DI1 and EXT2 (AUTO) Start command to DI6. 0 A 0 Hz 0.0 % 0. 0. OFF 0.0Hz 00:00 MENU PARAMETERS ASSISTANTS CHANGED PAR EXIT 00:00 ENTER OFF MAIN MENU 2 Spin the motor Commission drive Application References 1 & 2 Start/Stop Control EXIT 00:00 SEL OFF ASSISTANTS 3 9902 APPLIC MACRO PAR EDIT HVAC DEFAULT [1] OFF EXIT 00:00 SAVE Do you want to use mechanical HAND-OFF-AUTO switch? Yes No EXIT 00:00 OK OFF CHOICE ACH550-01 User's Manual Application macros and wiring 95 Restoring defaults To restore the default factory settings, select the application macro HVAC default. ACH550-01 User's Manual 96 Application macros and wiring 1. HVAC default The HVAC default application macro is used e.g. for typical BMS applications. The factory set configuration of inputs and outputs of the drive is as shown in the figure on page 97. When using a direct speed reference in the AUTO mode, the speed reference must be connected to analogue input 1 (AI1) and the START command is given with digital input 1 (DI1). In the HAND/OFF mode, the speed reference and START command are given through the control panel (operator keypad). If process PI(D) is used, the feedback signal must be connected to analogue input 2 (AI2). By default, the setpoint is set from the control panel, but it can also be changed to analogue input 1. Process PI(D) must be commissioned and adjusted with parameters (Group 40: PROCESS PID SET 1) or using the PID control assistant (recommended). ACH550-01 User's Manual Application macros and wiring 97 1 SCR Signal cable shield (screen) 2 AI1 External reference 1: 0(2)…10 V or 0(4)…20 mA 3 AGND Analogue input circuit common 4 10V Reference voltage +10 V DC 5 AI2 Actual signal 1: 0(2)…10 V or 0(4)…20 mA 3 6 AGND Analogue input circuit common 7 AO1 Output frequency: 0(4)…20 mA 8 AO2 Output current: 0(4)…20 mA 9 AGND Analogue output circuit common 10 24V Auxiliary voltage output +24 V DC 11 GND Common for DI return signals 12 DCOM Digital input common for all 13 DI1 Start/Stop: Activation starts the drive 14 DI2 Not used 15 DI3 Constant speed 1 (par. 1202) 1 16 DI4 Start enable 1: Deactivation stops the drive 2 17 DI5 Not used 18 DI6 Not used 19 RO1C Relay output 1 (par. 1401) Default operation Ready => 19 connected to 21 20 RO1A 21 RO1B 22 RO2C Relay output 2 (par. 1402) Default operation Running => 22 connected to 24 23 RO2A 24 RO2B 25 RO3C Relay output 3 (par. 1403) Default operation Fault (-1) => 25 connected to 27 26 RO3A 27 RO3B 1 Not available if PID is activated 2 Disable/enable with parameter 1608 3 The sensor for AI2 is powered externally (not shown in the figure). See the manufacturer’s instructions. To use sensors supplied by the drive auxiliary voltage output, see page 124. Note: The drive starts only if possible protection functions (Run enable or Start enable 1 and 2) are activated from I/O or disabled with parameters.
Copyright ©2019-2022 瑞昌明盛自动化设备有限公司 版权所有 赣ICP备2021006016号


