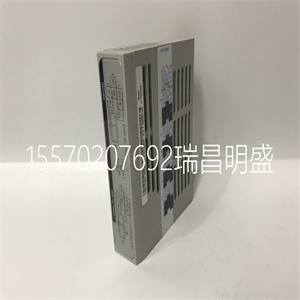
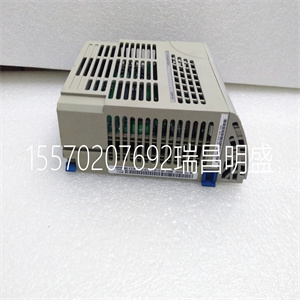
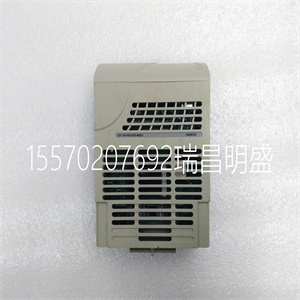
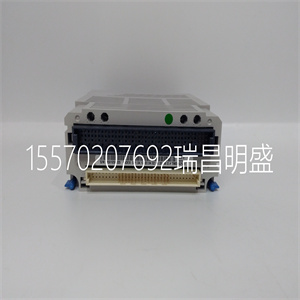


1X00480G02
存储体B启动WP开关断开,表示闪存存储体A启动
块是写保护的。该开关打开表示无写保护
B组启动块的。
存储体A WP开关关闭,以指示整个闪存存储体B处于:
写保护。开关接通,表示存储体无写保护
启动块。
当启动存储体Sel开关接通时,
关闭时,电路板从存储体A引导。默认为打开(从存储器引导
B) 。
位置函数
3 VMEGAP_L
4 VMEGA4_L
5 VMEGA3_L
6 VMEGA2_L
7 VMEGA1_L
8 VMEGA0_L
1-12计算机组文献中心网站
硬件准备和安装1
当安全启动开关设置为OFF时,正常启动顺序应为
接着是MOTLoad。启用时,MOTLoad执行安全启动,期间
用户可以选择替代引导映像。
S4配置开关设置为以下默认设置:
硬件安装
将MVME6100安装到机箱中
使用以下步骤将MVME6100安装到您的计算机中:
底盘。
1.将静电带连接到手腕上。连接ESD的另一端
接地(请参阅开箱指南)。ESD
表1-4.配置开关(S4)
位置4 3 2 1
作用
B组启动WP
银行A WP
启动库SEL
安全启动
工厂
违约
关闭
WP
上
无WP
上
银行B
关闭
标准环境
4295 0604
1.
2.
3.
4.
开关1-关闭
开关2-接通
开关3-接通
开关4-关闭
上
与外围设备的连接
http://www.motorola.com/computer/literature 1-13
1.
整个过程中,皮带必须固定在手腕和地面上
程序
2.拆下任何可能填充该插槽的填充板。
3.将MVME6100的顶部和底部边缘安装到
底盘。
!
警告
警告:仅使用注入器手柄插入电路板,以避免
前面板和/或PCB损坏/变形。变形
前面板可能导致电气短路或其他电路板
故障
4.确保两个喷油器/喷射器的操纵杆朝外
位置
5.将MVME6100滑入机箱,直到感觉到阻力。
6.同时向内移动喷油器/推料器操纵杆。
7.验证MVME6100是否正确就位,并将其固定到
1X00480G02

1X00480G02
The Bank B Boot WP switch is OFF to indicate that the Flash Bank B Boot block is write-protected. The switch is ON to indicate no write-protection of Bank B Boot block. The Bank A WP switch is OFF to indicate that the entire Flash Bank A is write-protected. The switch is ON to indicate no write-protection of Bank A Boot block. When the Boot Bank Sel Switch is ON, the board boots from Bank B, when OFF, the board boots from Bank A. Default is ON (boot from Bank B). Position Function 3 VMEGAP_L 4 VMEGA4_L 5 VMEGA3_L 6 VMEGA2_L 7 VMEGA1_L 8 VMEGA0_L 1-12 Computer Group Literature Center Web Site Hardware Preparation and Installation 1 When the Safe Start switch is set OFF, normal boot sequence should be followed by MOTLoad. When ON, MOTLoad executes Safe Start, during which the user can select the Alternate Boot Image. The S4 Configuration Switch is set with the following default settings: Hardware Installation Installing the MVME6100 into a Chassis Use the following steps to install the MVME6100 into your computer chassis. 1. Attach an ESD strap to your wrist. Attach the other end of the ESD strap to an electrical ground (refer to Unpacking Guidelines). The ESD Table 1-4. Configuration Switch (S4) POSITION 4 3 2 1 FUNCTION BANK B BOOT WP BANK A WP BOOT BANK SEL SAFE START FACTORY DEFAULT OFF WP ON No WP ON Bank B OFF Norm ENV 4295 0604 1 2 3 4 Switch 1 - OFF Switch 2 - ON Switch 3 - ON Switch 4 - OFF ON Connection to Peripherals http://www.motorola.com/computer/literature 1-13 1 strap must be secured to your wrist and to ground throughout the procedure. 2. Remove any filler panel that might fill that slot. 3. Install the top and bottom edge of the MVME6100 into the guides of the chassis. ! Warning Warning Only use injector handles for board insertion to avoid damage/deformation to the front panel and/or PCB. Deformation of the front panel can cause an electrical short or other board malfunction. 4. Ensure that the levers of the two injector/ejectors are in the outward position. 5. Slide the MVME6100 into the chassis until resistance is felt. 6. Simultaneously move the injector/ejector levers in an inward direction. 7. Verify that the MVME6100 is properly seated and secure it to the
Copyright ©2019-2022 瑞昌明盛自动化设备有限公司 版权所有 赣ICP备2021006016号


