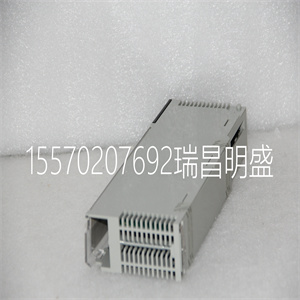
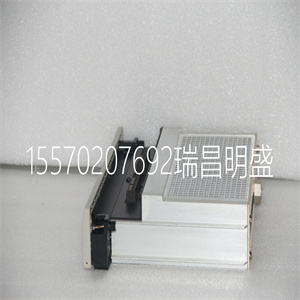
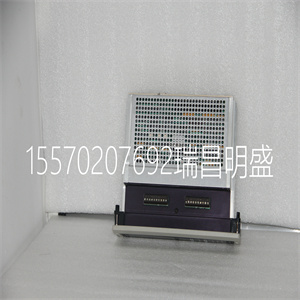
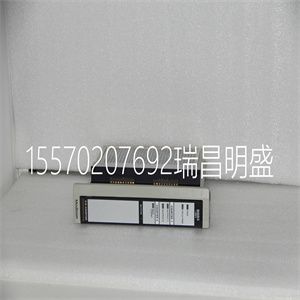


140XCP90000
注:始终使用ABB自动化现场静态套件(零件号
1948385A1),包括两条腕带、接地线组件、鳄鱼
使用静电敏感时,夹子和静电消散工作表面
设备。该套件旨在连接技师和静电消散
工作面应与接地点相同,以防静电放电损坏静电敏感装置。
安装和安装时使用静电接地腕带
移除模块。静电放电可能会损坏机柜中模块上的静电敏感设备。使用接地设备
使用静电敏感时的静电安全实践
设备。
1.使用静电屏蔽袋。保持模块处于静态状态
屏蔽袋,直到您准备将其安装到系统中。
保存袋子以备将来使用。
2.打开前将袋子磨碎。打开装有静电敏感装置的组件的袋子前,将其触摸到
用于均衡电荷的设备外壳或地面。
3.避免接触电路。通过处理程序集
边缘;避免接触电路。
4.避免部分连接静电敏感装置。
验证连接到模块的所有设备是否正确
使用前接地。
5.地面测试设备。
3-2 WBPEEUI240774A0
开箱检查
6.使用防静电现场服务真空。除尘
如有必要,从卡上取下。
7.使用接地腕带。将腕带连接到
适当的接地插头。
8.不要使用铅铅笔设置双列直插开关。避
开关触点污染可能导致不必要的电路板故障,请勿使用铅笔设置
双列直插开关。
开箱检查
1.立即检查硬件,以验证其是否已
运输途中损坏。
2.通知近的ABB自动化销售办事处
损坏
3.向处理货物的运输公司提出任何损坏索赔。
4.使用原包装材料和容器储存
硬件
5.将硬件存储在空气质量良好的环境中,
无温度和湿度。
设置和安装
注:有关将IMASI03模块替换为IMASI23模块的信息,请参阅附录C或附录B。
向ASI模块通电前,进行以下检查:
1.检查模块地址设置是否正确。
2.检查模块上的跳线设置是否正确。
3.确保模块安装单元的I/O中的DIP分路
扩展器总线安装正确。
4.检查终端装置上的跳线是否已设置
正确地
5.验证I/O电缆连接。
设置和安装
WBPEEUI240774A0 3-3
6.验证模块安装单元中的模块有足够的逻辑和现场电源。
地址选择开关(S1)
ASI模块必须具有与之通信的地址
控制器。ASI模块可以具有64个
I/O扩展器总线上的地址(地址0至63)。这
地址标识控制器的ASI模块,并且必须是
与控制器配置数据中设置的地址相同
(FCs 215和216,规范S1)。
使用八位地址双列直插开关S1设置地址
(图3-1)。以下六个右开关位置(三到八个):
S1设置六位地址。一和二位必须保留
正常运行时关闭(设置为零)(图3-2)。
地址以二进制格式设置。表3-1显示了一些
开关S1的地址设置示例。请参阅6节
诊断设置。记录I/O扩展器总线地址
在所提供的空间中的ASI模块。
图3-1.模块布局
P1
P3
P2
M O D U L E S TAT U S
发光二极管
S1地址
转换
边缘
连接器
模拟输入
在IO N JU M P E R的C O N F IG U R
BLO CKS,J1-J16
U29 S 1
J1、J2、J3、J4、J5、J6、J7、J8、J9、J10、J11、J12、J13、J14、J15
J16
T01063C
3-4 WBPEEUI240774A0
设置和安装
配置输入
通过在FCs中设置规范来配置ASI模块
215和216,并将输入跳线设置为on
ASI模块和终端单元两者。提到
有关配置和校准的更多信息,请参见4节。
ASI模块上的每个输入都有一个跳线块。跳伞者
块有不同的配置方式:毫伏、热电偶、RTD、电压和电流。跳线块J1匹配
通道1,跳线块J5与通道5,跳线匹配
块J16匹配信道16等。每个信道可以独立配置。ASI模块可以有任何编号
配置为电阻、低电平电压或高电平的输入
电平电压。
图3-2.S1开关
表3-1地址开关设置示例(S1)
住址
实例
开关位置1,2
(二进制值)
3.
(32)
4.
(16)
5.
(8)
6.
(4)
7.
(2)
8.
(1)
08 0 0 1 0 0 0
32 1 0 0 0 0 0
63 1 1 1 1 1 1
用户设置
笔记:
1.开关位置1和2必须闭合。
2.0=关闭或打开,1=打开或关闭。
1 2 3 4 5 6 7 8
打开
必须
雷姆
关闭
输入/输出
地址
MSB LSB
N OT E:OP E N PO状态=逻辑1 T01800A
设置和
140XCP90000
140XCP9 0000
0000
OTE: Always use the ABB Automation field static kit (part number
1948385A1), consisting of two wrist straps, ground cord assembly, alligator
clip, and static dissipating work surface when working with static sensitive
devices. The kit is designed to connect the technician and the static dissipating
work surface to the same ground point to prevent damage to the static sensitive devices by electrostatic discharge.
Use the static grounding wrist strap when installing and
removing modules. Static discharge may damage static sensitive devices on modules in a cabinet. Use grounded equipment
and static safe practices when working with static sensitive
devices.
1. Use Static Shielding Bag. Keep the module in its static
shielding bag until you are ready to install it in the system.
Save the bag for future use.
2. Ground Bags before Opening. Before opening a bag containing an assembly with static sensitive devices, touch it to
the equipment housing or ground to equalize charges.
3. Avoid Touching Circuitry. Handle assemblies by the
edges; avoid touching the circuitry.
4. Avoid Partial Connection of Static Sensitive Devices.
Verify that all devices connected to the modules are properly
grounded before using them.
5. Ground Test Equipment.
3 - 2 WBPEEUI240774A0
Unpacking and Inspection
6. Use an Antistatic Field Service Vacuum. Remove dust
from the cards if necessary.
7. Use a Grounded Wrist Strap. Connect the wrist strap to
the appropriate grounding plug.
8. Do Not Use Lead Pencils to Set Dipswitches. To avoid
contamination of switch contacts that can result in unnecessary circuit board malfunction, do not use a lead pencil to set a
dipswitch.
Unpacking and Inspection
1. Examine the hardware immediately to verify it has not been
damaged in transit.
2. Notify the nearest ABB Automation sales office of any such
damage.
3. File a claim for any damage with the transportation company that handled the shipment.
4. Use the original packing material and container to store the
hardware.
5. Store the hardware in an environment of good air quality,
free from temperature and moisture extremes.
Setup and Installation
NOTE: Refer to Appendix C for information about replacing an IMASI03 module or Appendix B for an IMASI13 with an IMASI23 module.
Before applying power to the ASI module, make these checks:
1. Check that the module address is set correctly.
2. Check that the jumpers on the module are set correctly.
3. Be sure the dipshunts in the module mounting unit's I/O
expander bus are installed correctly.
4. Check that the jumpers on the termination units are set
correctly.
5. Verify I/O cabling connections.
Setup and Installation
WBPEEUI240774A0 3 - 3
6. Verify there is sufficient logic and field power for the modules in the module mounting unit.
Address Selection Switch (S1)
The ASI module must have an address to communicate with
the controller. The ASI module can have any one of 64
addresses (address 0 to 63) on the I/O expander bus. This
address identifies the ASI module to the controller and must be
the same as the address set in the controller configuration data
(FCs 215 and 216, specification S1).
Set the address with the eight position address dipswitch S1
(Fig. 3-1). The six right switch positions (three through eight) of
S1 set the six-bit address. Positions one and two must remain
closed (set to zero) for normal operation (Fig. 3-2).
The address is set in binary format. Table 3-1 shows some
example address settings for switch S1. Refer to Section 6 for
the diagnostic settings. Record the I/O expander bus address
of the ASI module in the space provided.
Figure 3-1. Module Layout
P 1
P 3
P 2
M O D U L E S TAT U S
LEDS
S1 ADDRESS
SWITCH
EDGE
CONNECTORS
ANALOG INPUT
C O N F IG U R AT IO N JU M P E R
BLO CKS, J1-J16
U29 S 1
J1 J2 J3 J4 J5 J6 J7 J8 J9 J10 J11 J12 J13 J14 J15
J16
T01063C
3 - 4 WBPEEUI240774A0
Setup and Installation
Configuring Inputs
Configure the ASI module by setting the specifications in FCs
215 and 216 in the controller and setting the input jumpers on
both the ASI module and the termination unit. Refer to
Section 4 for more information on configuration and calibration.
Each input on the ASI module has a jumper block. The jumper
block has different ways it can be configured: millivolt, thermocouple, RTD, voltage and current. Jumper block J1 matches
channel one, jumper block J5 matches channel five, jumper
block J16 matches channel 16, etc. Each channel can be configured independently. The ASI module can have any number
of inputs configured as resistance, low level voltage, or high
level voltage.
Figure 3-2. S1 Switch
Table 3-1. Sample Address Switch Settings (S1)
Address
Example
Switch Position1,2
(Binary Value)
3
(32)
4
(16)
5
(8)
6
(4)
7
(2)
8
(1)
08 0 0 1 0 0 0
32 1 0 0 0 0 0
63 1 1 1 1 1 1
User setting
NOTES:
1. Switch positions 1 and 2 must be closed.
2. 0 = closed or on, 1 = open or off.
1 2 3 4 5 6 7 8
OPEN
MUST
REM AIN
CLOSED
I/O
ADDRESS
MSB LSB
N OT E: OP E N PO S ITION = LOGIC 1 T01800A
Setup and Installation
WBPEEUI240774A0 3 - 5
Refer to figure 3-3 for the jumper block configurations.
Termination Unit Configuration
An NTAI06 termination unit connects the field device wiring to
the Symphony system. The terminal blocks are located on the
termination unit. Set up the termination unit to accept the
analog field inputs sent to the IMASI23 module. Refer to
Appendix A for the termination unit information.
Physical Installation
NOTE: This section provides data on the physical installation of the analog
input module only. For complete cable and termination module information,
refer to Appendix A.
The IMASI23 module occupies one slot in a standard module
mounting unit (MMU). To install the module:
1. Verify the slot placement of the module.
2. Verify that a dipshunt is in the I/O expander bus socket on
the MMU backplane between the analog input module and
controller.
3. Connect the hooded end of the cable from the termination
unit to the MMU backplane. To do this, insert the connector
into the backplane slot in the same slot as the one assigned to
the analog input module. The latches should snap securely
into place.
Figure 3-3. Six Pin Jumper Block Configurations
mV/TC V/mA RTD
T04355A
WARNING
Disconnect power before installing dipshunts on the MMU
backplane. Failure to do so will result in contact with cabinet
areas that could cause severe or fatal shock.
3 - 6 WBPEEUI240774A0
Wiring Connections and Cabling
4. Align the module with the guide rails in the module mounting unit. Carefully slide the module in until the front panel is
flush with the top and bottom of the MMU frame.
5. Push and turn the two captive latches on the module faceplate one half turn to the latched position. It is latched when
the slots on the latches are vertical and the open ends face the
center of the module. Refer to Figure 3-4.
Wiring Connections and Cabling
The IMASI23 module has three card edge connectors to supply
power (P1), connect I/O expander bus communication (P2),
and provide analog inputs (P3).
Wiring
Install the analog input module in the module mounting unit
to connect the module to the +5 VDC voltages needed to power
the circuits. The module mounting unit also connects P2 to the
I/O expander bus for communication with the controller. P1
and P2 connection require no additional wiring or cabling.
NOTE: A dipshunt on the backplane of the module mounting unit connects the
I/O expander bus between the ASI module and the controller. Locate the module so the bus can connect to them or they will not communica
Copyright ©2019-2022 瑞昌明盛自动化设备有限公司 版权所有 赣ICP备2021006016号


