


项目价值
内存•4 MB闪存PROM(固件存储)。
•32 MB的SDRAM。
电流隔离是
连接器•一个7针螺纹连接器
•一个RJ45连接器(SM链路)
电流消耗
(来自CEX总线24 V直流)
典型160 mA(大250 mA)
典型功耗3.8 W
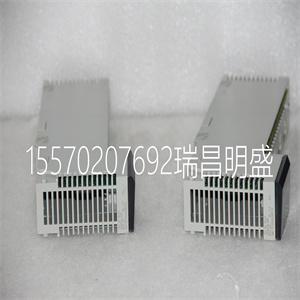
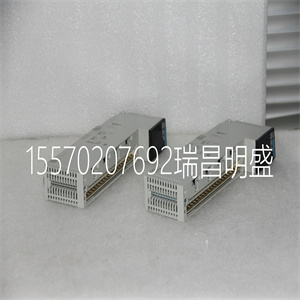
附录A硬件单元SM811和TP868
3BSE036351-510 A 281
重量700克(1.5磅)(包装SM811K01,带
SM811和TP868)。
尺寸宽59 x高185 x深127.5 mm
(宽2.9 x高7.3 x深5.0英寸)
表74.SM811-数字输入规范
项目价值
电气隔离是的
过电压II类
额定绝缘电压50 V
绝缘测试电压500 V交流1分钟
标称电压24 V
电压限制
(UL=逻辑0,UH=逻辑1)
-30 V<UL<5 V
15伏<UH<30伏
标称电流12 mA
电流限制-22 mA<IL<2 mA
6 mA<IH<18 mA
输入阻抗1.8千欧姆
表73.SM811规范(续)
项目价值
SM811和TP868附录A硬件单元
282 3BSE036351-510 A
高完整性控制器能够使用SM811运行SIL3应用程序。
执行热插拔或将附加/替换SM811插入运行
系统影响SIL3应用程序。
应配置该模块以实现同步。运行SIL3时
应用程序,同步的开始必须被用户接受,以
配置插入的模块。
如果一个或多个SIL3应用程序正在控制器中运行,则它们将临时
中断,以获得新插入的应用程序的一致状态
SM811.用户必须通过在上创建边缘来确认应用程序停止
已运行的主安全模块上的数字输入3。
表75.SM811-数字输出规格
项目价值
电气隔离是的
过电压II类
额定绝缘电压50 V
绝缘测试电压500 V交流1分钟
标称电压24 V
工艺电压范围(高)12…32 V
导通状态输出电压(UA)上升-0.5 V<UA<上升
大连续负载电流0.5 A
断开状态输出漏电流<10 mA
大短路电流<2.4 mA
输出阻抗<0.4欧姆
为了执行运行SIL3应用程序的SM811的热插拔
访问启用数字输入(I2)必须通过钥匙开关打开
热插入数字输入(I3)开启。
附录A硬件单元SM811和TP868
3BSE036351-510 A 283
这是通过将物理按钮连接到数字输入来实现的。这个
如果未确认,系统将等待30分钟等待确认
接收到插入的SM811将关闭。要恢复,新的热插拔需要
即SM811必须被移除并再次插入。
SM811的同步包括:
1.确保SM811之间的同步链路到位,即
是,封闭的TK852V010电缆正确连接到两个SM链路
连接器。
2.将SM811插入其位置。
3.当SM811启动时,同步LED闪烁,稍后继续
按顺序闪烁3次并暂停。
4.按下按钮(在已经运行的安全装置上的数字输入3上创建边缘
模块),一旦它开始以3次闪烁和暂停序列重复闪烁。
5.同步LED快速闪烁,直到同步完成。
6.当模块同步时,同步LED变黄。
热插入前,确保SM链路电缆TK852V010已连接,并且
奥卢。如果需要,可以更换SM链路电缆TK852V010,但以下情况除外:
热插拔和OLU。拔下电缆会导致诊断错误,并且
必须修理或更换电缆。
非SIL和SIL1-2应用不受SM811同步的影响。
它们在整个同步过程中继续正常执行
而不被中断。
SM811的热插拔要求两个安全模块与
同步链路,用于传输应用程序状态。
在热交换期间,无法从下载新配置
控件生成器,保留控制器。将通知控件生成器用户
具有信息对话框。当热插入时,将释放保留
结束或中止。如果正在进行配置下载,则热插入
下载完成后开始Item Value
Memory • 4 MB flash PROM (firmware storage).
• 32 MB of SDRAM.
Galvanic isolation Yes
Connectors • One 7 pin screw connector
• One RJ45 connector (SM Link)
Current consumption
(from CEX-Bus 24 V DC)
160 mA typical (250 mA max)
Power dissipation 3.8 W typical
Appendix A Hardware Units SM811 and TP868
3BSE036351-510 A 281
Weight 700 g (1.5 lb) (package SM811K01 with
SM811 and TP868).
Dimensions W 59 x H 185 x D 127.5 mm
(W 2.9 x H 7.3 x D 5.0 in)
Table 74. SM811 - Digital Input Specifications
Item Value
Electric isolation Yes
Overvoltage category II
Rated insulation voltage 50 V
Insulation test voltage 500 V a.c. 1 min
Nominal voltage 24 V
Voltage limits
(UL = logic 0, UH = logic 1)
- 30 V < UL < 5 V
15 V < UH < 30 V
Nominal current 12 mA
Current limits - 22 mA < IL < 2 mA
6 mA < IH < 18 mA
Input impedance 1.8 kOhm
Table 73. SM811 Specifications (Continued)
Item Value
SM811 and TP868 Appendix A Hardware Units
282 3BSE036351-510 A
The High Integrity controller is able to run SIL3 applications using SM811.
Performing a Hot swap or inserting an additional/replacement SM811 into a running
system affects SIL3 applications.
The Module should be configured in order to get synchronized. When running SIL3
applications, the start of the synchronization must be accepted by the user, to
configure the inserted module.
If one or more SIL3 applications are running in the controller, they are temporarily
interrupted in order to get a consistent state of the application to the newly inserted
SM811. The user must acknowledge the application stop by creating a edge on
digital input 3 on the primary, already running, Safety Module.
Table 75. SM811 - Digital Output Specifications
Item Value
Electric isolation Yes
Overvoltage category II
Rated insulation voltage 50 V
Insulation test voltage 500 V a.c. 1 min
Nominal voltage 24 V
Process voltage range (UP) 12... 32 V
On-state output voltage (UA) UP - 0.5 V < UA < UP
Maximum continuous load current 0.5 A
Off-state output leakage current < 10 mA
Maximum short circuit current < 2.4 mA
Output impedance < 0.4 ohm
For performing the hot swap of SM811 running a SIL3 application, the
Access enable digital input (I2) must be turned ON through the key switch before
the Hot-insert digital input (I3) is turned ON.
Appendix A Hardware Units SM811 and TP868
3BSE036351-510 A 283
This is performed by connecting a physical push-button to the digital input. The
system waits for 30 minutes for the acknowledgement, if acknowledgement is not
received the inserted SM811 will shut down. To recover, a new hot insert needs to be
initiated i.e. the SM811 has to be removed and inserted again.
Synchronization of the SM811 includes:
1. Make sure that the synchronization link between the SM811s is in place, that
is, the enclosed TK852V010 cable is properly connected into both SM Link
connectors respectively.
2. Insert the SM811 in its position.
3. When the SM811 starts the synchronization LED flashes, and later it continues
to blink with 3 blinks and a pause in a sequence.
4. Push the button (create an edge on digital input 3 on the already running Safety
Module), once it starts blinking repeatedly with 3 blinks and a pause sequence.
5. The Sync LED flashes faster until the synchronization is complete.
6. The Sync LED turns yellow when the module is synchronized.
Make sure that SM Link Cable TK852V010 is connected before hot-insert and
OLU. The SM Link Cable TK852V010 can be replaced if needed, except during
hot-insert and OLU. Removing the cable results in a diagnostic error and the
cable must be repaired or replaced.
Non-SIL and SIL1-2 applications are not affected by synchronization of SM811.
They continue to execute as normal throughout the entire synchronization
without being interrupted.
A Hot Swap of SM811 requires the two safety modules to be connected with a
synchronization link, used to transfer the application state.
During a hot swap it is not possible to download a new configuration from
Control Builder, the controller is reserved. The Control Builder user is notified
with an information dialog. The reservation is released when the hot insert is
concluded or aborted. If a configuration download is ongoing, then the hot insert
starts after the download is completed
Copyright ©2019-2022 瑞昌明盛自动化设备有限公司 版权所有 赣ICP备2021006016号


