


MSK071E-0300-NN-M1-Ug2-NNNN
MSK071E-0300-NN-M1-Ug2-NNNN

MSK071E-0300-NN-M1-Ug2-NNNN
EPROM大小选择头(J21)
MVME162在工厂配置为4Mbit EPROM(即,跳线为
跨销2和3安装)。这是目前一可用的尺寸;如果
当较大的EPROM可用时,此跳线将允许选择它。
(工厂配置)
VMEbus+5V备用电源
J20
1 2
5 6
J20
1 2
5 6
J20
1 2
备用电源禁用车载电池
5 6
(仅用于存储)
1.
2.
3.
(工厂配置)
J21
4Mbit EPROM
硬件准备和安装
2-8 MVME162嵌入式控制器用户手册
2个通用可读跳线头(J22)
标题J22提供八个可读跳线。这些跳线可以理解为
在MCchip LCSR(本地控制/状态寄存器)中注册(FFF420D美元)。
安装跳线时,位值被读取为零,并被读取为1
当拆下跳线时。
如果安装了MVME162BUG固件,则四个跳线可由用户定义
(引脚1-2、3-4、5-6、7-8)。如果未安装MVME162BUG固件,七
跳线可由用户定义(引脚1-2、3-4、5-6、7-8、11-12、13-14、15-16)。
注:引脚9-10(GPIO3)保留用于选择闪存
内存映射(已安装跳线)或EPROM内存
地图(跳线已移除)。它们不是用户可定义的。
MVME162出厂时,J22设置为全零(跳线接通
所有引脚)。
J22
15
GPIO7
GPIO6
GPIO5
GPIO1
GPIO4
GPIO3
GPIO2
1 2
GPIO0 16
选择的EPROM(工厂配置)
用户可定义
用户可定义
用户可定义
请参阅162BUG手册
用户可定义
IN=闪光;输出=EPROM
请参阅162BUG手册
请参阅162BUG手册
162已安装错误
用户可定义
用户可定义
用户可定义
用户可定义
用户可定义
IN=闪光;输出=EPROM
用户可定义
用户可定义
已安装的用户代码
9 10
安装说明
MVME162/D2 2-9
2安装说明
以下各节讨论在上安装IndustryPack(IPs)
MVME162,将MVME162s安装到VME机箱中,以及
与安装相关的系统注意事项。安装前
IndustryPacks,确保串行端口和所有接头跳线
根据需要配置。
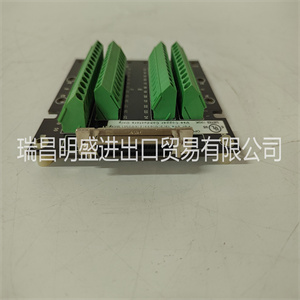
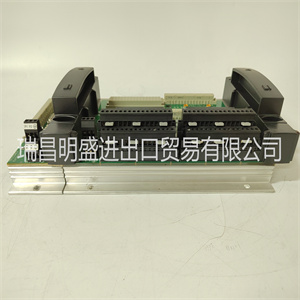
MVME162上的IP安装
MVME162上多可安装四个IndustryPack(IP)模块。
在MVME162上安装IPs,如下所示:
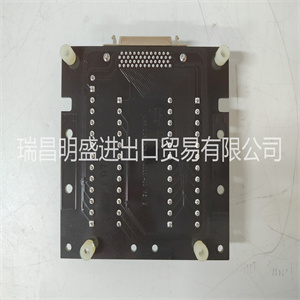
1.每个IP有两个50针连接器,插入两个相应的50-
MVME162上的引脚连接器:J2/J3、J7/J8、J13/J14、J18/J19。见图
MVME162连接器位置见2-1。
–调整仪表板的方向,使锥形连接器外壳正确配合。
将IP_a插入连接器J2和J3;将IP_b插入J7和J8。插入IP_c
转换成J13和J14;将IP_d插入J18和J19。如果双尺寸IP
使用时,将IP_ab插入J2、J3、J7和J8;将IP_cd插入J13、J14、J18和
J19。
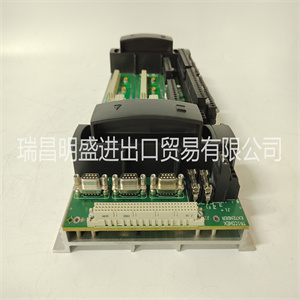
2.后面提供了四个额外的50针连接器(J6、J5、J17和J16)
MVME162前面板用于连接至IP的外部电缆
模块。上的信号之间存在一对一的对应关系
电缆连接器和相关IP连接器上的信号(即J6
具有与J2相同的IP_ a信号;J5具有与J7相同的IP_ b信号;J17已经
与J13相同的IP_ c信号;并且J16具有与J18相同的IP_ d信号。
–根据需要将用户提供的50针电缆连接到J6、J5、J17和J16。
由于对每种不同类型IP的不同要求,
摩托罗拉不提供这些电缆。
–将IP电缆从MVME162前面板的窄槽中取出
并将它们连接到适当的EPROM Size Select Header (J21)
The MVME162 is factory-configured for a 4Mbit EPROM (i.e., a jumper is
installed across pins 2 and 3). This is the only size currently available; if a
larger EPROM becomes available, this jumper will allow it to be selected.
(Factory configuration)
VMEbus +5V STBY
J20
1 2
5 6
J20
1 2
5 6
J20
1 2
Backup Power Disabled Onboard Battery
5 6
(For storage only)
1
2
3
(Factory configuration)
J21
4Mbit EPROM
Hardware Preparation and Installation
2-8 MVME162 Embedded Controller User’s Manual
2 General-Purpose Readable Jumpers Header (J22)
Header J22 provides eight readable jumpers. These jumpers can be read as a
register (at $FFF4202D) in the MCchip LCSR (local control/status register).
The bit values are read as a zero when the jumper is installed, and as a one
when the jumper is removed.
If the MVME162BUG firmware is installed, four jumpers are user-definable
(pins 1-2, 3-4, 5-6, 7-8). If the MVME162BUG firmware is not installed, seven
jumpers are user-definable (pins 1-2, 3-4, 5-6, 7-8, 11-12, 13-14, 15-16).
Note Pins 9-10 (GPIO3) are reserved to select either the Flash
memory map (jumper installed) or the EPROM memory
map (jumper removed). They are not user-definable.
The MVME162 is shipped from the factory with J22 set to all zeros (jumpers on
all pins).
J22
15
GPIO7
GPIO6
GPIO5
GPIO1
GPIO4
GPIO3
GPIO2
1 2
GPIO0 16
EPROMs Selected (factory configuration)
USER-DEFINABLE
USER-DEFINABLE
USER-DEFINABLE
REFER TO 162BUG MANUAL
USER-DEFINABLE
IN=FLASH; OUT=EPROM
REFER TO 162BUG MANUAL
REFER TO 162BUG MANUAL
162BUG INSTALLED
USER-DEFINABLE
USER-DEFINABLE
USER-DEFINABLE
USER-DEFINABLE
USER-DEFINABLE
IN=FLASH; OUT=EPROM
USER-DEFINABLE
USER-DEFINABLE
USER CODE INSTALLED
9 10
Installation Instructions
MVME162/D2 2-9
2 Installation Instructions
The following sections discuss the installation of IndustryPacks (IPs) on the
MVME162, the installation of the MVME162 into a VME chassis, and the
system considerations relevant to the installation. Before installing
IndustryPacks, ensure that the serial ports and all header jumpers are
configured as desired.
IP Installation on the MVME162
Up to four IndustryPack (IP) modules may be installed on the MVME162.
Install the IPs on the MVME162 as follows:
1. Each IP has two 50-pin connectors that plug into two corresponding 50-
pin connectors on the MVME162: J2/J3, J7/J8, J13/J14, J18/J19. See Figure
2-1 for the MVME162 connector locations.
– Orient the IP(s) so that the tapered connector shells mate properly.
Plug IP_a into connectors J2 and J3; plug IP_b into J7 and J8. Plug IP_c
into J13 and J14; plug IP_d into J18 and J19. If a double-sized IP is
used, plug IP_ab into J2, J3, J7, and J8; plug IP_cd into J13, J14, J18, and
J19.
2. Four additional 50-pin connectors (J6, J5, J17, and J16) are provided behind
the MVME162 front panel for external cabling connections to the IP
modules. There is a one-to-one correspondence between the signals on the
cabling connectors and the signals on the associated IP connectors (i.e., J6
has the same IP_a signals as J2; J5 has the same IP_b signals as J7; J17 has
the same IP_c signals as J13; and J16 has the same IP_d signals as J18.
– Connect user-supplied 50-pin cables to J6, J5, J17, and J16 as needed.
Because of the varying requirements for each different kind of IP,
Motorola does not supply these cables.
– Bring the IP cables out the narrow slots in the MVME162 front panel
and attach them to the appropriate
Copyright ©2019-2022 瑞昌明盛自动化设备有限公司 版权所有 赣ICP备2021006016号


