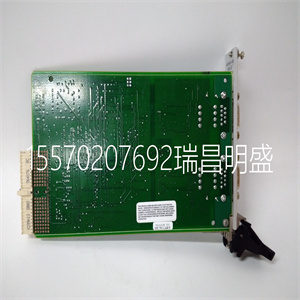
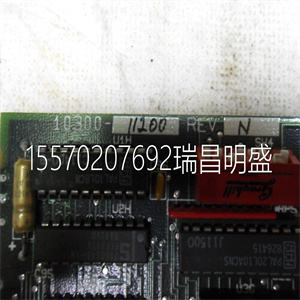


07ZE61R302 GJV3074321R302 过程控制CPU模块
PM891模块总线具有光纤接口。设计了界面
多七个集群,十二个非冗余或六个冗余模块
(即7x12=84个模块)。冗余和非冗余模块可以混合使用。
光纤接口用于I/O集群的本地分布。
图41提供了光纤连接器的详细信息,以及
PM891光学模块总线端口。
图41.光模块总线Tx Rx的PM891连接器
单工光缆连接器
双工光纤电缆连接器
2节安装安装SD83x电源
3BSE036351-510 A 133
安装SD83x电源
SD83x电源装置(SD831/SD832/SD833/SD834)应:
水平安装在DIN导轨上。装置必须用于非危险区域
仅限位置。
四个PSU的数据如下:
–SD831=输入交流100-240 V或直流110-300 V。
输出直流24伏,在3 A时调节。
–SD832=输入交流100-120或200-240 V。
输出直流24伏,5 A时调节
–SD833=输入交流100-120或200-240 V。
输出直流24伏,10 A时调节
–SD834=输入交流100-240 V或直流110-300 V。
输出直流24伏,20 A时调节
内部一次主熔断器的布置应满足电气要求
一次主电源相中性端子连接的安全出版物
网络TN网络,1(一)个保险丝。当SD831和SD834与直流电一起使用时。
输入,将+端子连接到L,将-端子连接到N。
建议安装空间和重量:
表18.PSU的SD831、832、833、834-安装空间和重量。
参数SD831
转换器
SD832
转换器
SD833
转换器
SD834
转换器
安装间距顶部(1)
(1) 请勿将温度敏感单元放置在PSU上方。
40毫米40毫米40 mm 40毫米
安装间距底部(2)
(2) 请勿将高功耗单元放置在PSU下方。
20mm 20mm 20mm 20mm
安装间距侧面15 mm 15 mm 15毫米15 mm
重量430克500克700克1200克
安装电源断路器装置2节:安装
134 3BSE036351-510 A
安装电源断路器装置
电源断路器单元由必须安装的独立组件提供
以形成完整的组件。不同的分配选择
参见177页图61和178页图62
为简单起见,所述安装包括冗余电源
电源/独立电源选项。
使用以下步骤正确安装电源断路器单元:
1.将电源断路器单元部件从左至右安装到DIN导轨上,
靠近输入电源,顺序如下(参见图42
135页)。
a、 DIN导轨端部止动器(1)。
b、 输入保护接地端子(2)。
c、 输入带电和中性主电源(3)的两个端子。
这些端子配备有内置跳线,
可打开以提供完整的电源输入电源隔离。
d、 微型电源断路器单元(4)。
e、 保护接地配电端子(5)。
f、 主配电接线板(6),取决于所需
配置
g、 DIN导轨端部止动器(1)。
2.连接输入电源、保护接地端子、电源
断路器和配电端子,如135页图42所示。
3.将所需的两个连接件(7)、保险丝座(8)和跨接线(9)安装到
配电终端。将所需保险丝安装到保险丝座(玻璃
管型,5 x 20毫米(0.2 x 0.8英寸))。
保护接地端子(2)配有刀形装置,以提供:
自动接地至DIN导轨。
07ZE61R302 GJV3074321R302 过程控制CPU模块

07ZE61R302 GJV3074321R302 过程控制CPU模块
The ModuleBus for PM891 has a fiber optical interface. The interface is designed
for a maximum of seven clusters, of twelve non-redundant or six redundant modules
(that is, 7x12 = 84 modules). Redundant and non-redundant modules can be mixed.
The fiber-optical interface is intended for local distribution of I/O clusters. .
Figure 41 on page 132 provides details of the fiber optic connectors, together with
the PM891 optical ModuleBus ports.
Figure 41. PM891 connectors for Optical ModuleBus Tx Rx
Simplex Fiber Optic Cable Connector
Duplex Fiber Optic Cable Connector
Section 2 Installation Installing the SD83x Power Supply
3BSE036351-510 A 133
Installing the SD83x Power Supply
The SD83x power supply units (SD831 / SD832 / SD833 / SD834) should be
mounted horizontally at a DIN rail. The units have to be used in non-hazardous
locations only.
The four PSUs have data as follows:
– SD831 = Input a.c. 100-240 V or d.c. 110-300 V.
Output d.c. 24 Volts regulated @ 3 A.
– SD832 = Input a.c. 100-120 or 200-240 V.
Output d.c. 24 Volts regulated @ 5 A
– SD833 = Input a.c. 100-120 or 200-240 V.
Output d.c. 24 Volts regulated @ 10 A
– SD834 = Input a.c. 100-240 V or d.c. 110-300 V.
Output d.c. 24 Volts regulated @ 20 A
Internal primary main fuses are arranged to meet the requirements of electrical
safety publications for connection to the Phase - Neutral terminals of primary main
network; TN network, 1 (one) fuse. When SD831 and SD834 are used with d.c.
input, connect + terminal to L and - terminal to N.
Recommended mounting space and weight:
Table 18. PSU’s SD831, 832, 833, 834 - Mounting space and weight.
Parameter SD831
Converter
SD832
Converter
SD833
Converter
SD834
Converter
Mounting spacing top(1)
(1) Do not place temperature sensitive units above the PSU.
40 mm 40 mm 40 mm 40 mm
Mounting spacing bottom(2)
(2) Do not place units with high power dissipation below the PSU.
20 mm 20 mm 20 mm 20 mm
Mounting spacing side 15 mm 15 mm 15 mm 15 mm
Weight 430 g 500 g 700 g 1200 g
Installing the Mains Breaker Unit Section 2 Installation
134 3BSE036351-510 A
Installing the Mains Breaker Unit
The mains breaker unit is supplied in separate components that must be mounted
onto a DIN-rail in order to form a complete assembly. Different distribution options
are available, see Figure 61 on page 177 and Figure 62 on page 178. For the sake of
simplicity, the installation described covers the redundant power
supplies/independent power supplies option.
Use the following procedure to correctly install the mains breaker unit:
1. Mount the mains breaker unit components onto the DIN-rail, from left to right,
close to the incoming power supply, in the order given below (see Figure 42 on
page 135).
a. A DIN-rail end-stop (1).
b. The terminal for the incoming protective ground (2).
c. The two terminals for the incoming Live and Neutral mains power (3).
These terminals are equipped with built-in jumpers which, if necessary,
can be opened to provide complete mains input power isolation.
d. The miniature mains breaker unit (4).
e. The protective ground distribution terminal (5).
f. The mains distribution terminal block (6), depending on the required
configuration.
g. A DIN-rail end-stop (1).
2. Connect the incoming mains, the protective ground terminals, the mains
breaker and the distribution terminals as shown in Figure 42 on page 135.
3. Install the two required links (7), fuse holders (8) and jumpers (9) onto
the distribution terminals. Fit the required fuses into the fuse holders, (glass
tube type, 5 x 20 mm (0.2 x 0.8 in)).
The protective ground terminal (2) is fitted with a knife-like device to provide
automatic grounding to the DIN-rail.
Copyright ©2019-2022 瑞昌明盛自动化设备有限公司 版权所有 赣ICP备2021006016号


