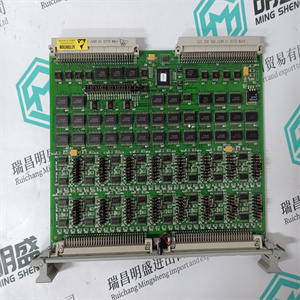
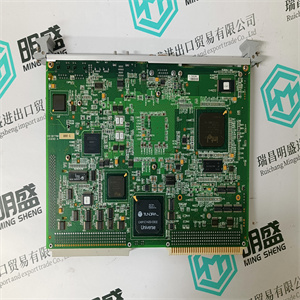
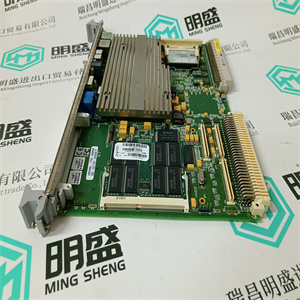


UFC760BE141 3BHE004573R0141 变频器主板原厂进口 ABB
以下信息提供了创建和打印存储在上的文档的过程
打印机这些作业可以稍后打印,也可以私下打印。
● 创建存储的作业(Windows)
● 创建存储作业(OS X)
● 打印存储的作业
● 删除存储的作业
● 发送给打印机的信息用于作业记帐
创建存储的作业(Windows)
将作业存储在打印机上,以便进行私人或延迟打印。
注意:打印驱动程序可能与此处显示的不同,但步骤相同。
1.从软件程序中选择打印选项。
2.从打印机列表中选择打印机,然后选择属性或项(名称因
不同的软件程序)。
注:按钮的名称因不同软件程序而异。
注意:要从Windows 8或8.1启动屏幕应用程序访问这些功能,请选择设备,选择打印,
然后选择打印机。
62第4章印刷版
3.单击作业存储选项卡。
4.选择作业存储模式选项。
● 校对和保留:打印和校对作业的一份副本,然后打印更多副本。
● 个人作业:直到您在打印机控制面板上请求时,作业才会打印。对于此作业存储模式,您可以选择“使作业专用/安全”选项之一。如果您分配个人
作业的识别号(PIN),必须在控制面板上提供所需的PIN。如果你
要加密作业,必须在控制面板上提供所需的密码。打印作业被删除
如果打印机断电,则会丢失。
● 快速复制:打印作业的请求份数,并将作业副本存储在打印机中
内存,以便稍后再次打印。
● 存储作业:将作业存储在打印机上,并允许其他用户随时打印作业。对于此作业存储模式,您可以选择“使作业专用/安全”选项之一。如果您分配个人
作业的识别号(PIN),打印作业的人员必须在
控制面板。如果加密作业,则打印作业的人员必须提供所需的
控制面板上的密码。
5.要使用自定义用户名或作业名称,请单击“自定义”按钮,然后输入用户名或作业
名称
如果另一个存储的作业已具有该名称,请选择要使用的选项:
● 使用作业名称+(1-99):在作业名称末尾附加一个的数字。
● 替换现有文件:用新作业覆盖现有存储作业。
6.单击“确定”按钮关闭“文档属性”对话框。在“打印”对话框中,单击“打印”
按钮打印作业。
7.有关如何打印作业的信息,请参阅“打印存储的作业”主题
ENWW将打印作业存储在打印机上,以便以后打印或私下打印63
创建存储作业(OS X)
将作业存储在打印机上,以便进行私人或延迟打印。
1.单击文件菜单,然后单击打印选项。
2.在打印机菜单中,选择打印机。
3.默认情况下,打印驱动程序显示复印件和页面菜单。打开菜单下拉列表,然后
单击作业存储菜单。
4.在模式下拉列表中,选择存储作业的类型。
● 校对和保留:打印和校对作业的一份副本,然后打印更多副本。
● 个人作业:在有人在打印机控制面板上请求作业之前,作业不会打印。如果工作
具有个人识别号(PIN),在控制面板上提供所需的PIN。打印作业
打印后从内存中删除,如果打印机断电则丢失。
● 快速复制:打印作业的请求份数,并将作业副本存储在打印机中
内存,以便稍后再次打印。
● 存储作业:将作业存储在打印机上,并允许其他用户随时打印作业。如果工作有
个人识别码(PIN),打印作业的人员必须在
控制面板。
5.要使用自定义用户名或作业名称,请单击“自定义”按钮,然后输入用户名或作业
名称
如果另一个存储的作业已具有该名称,请选择要使用的选项。
● 使用作业名称+(1-99):在作业名称末尾附加一个的数字。
● 替换现有文件:用新作业覆盖现有存储作业。
6.如果您在步骤3中选择了存储作业或个人作业选项,则可以使用PIN保护作业。a型4-
用于打印ƭeld的PIN中的数字。当其他人尝试打印此作业时,打印机会提示
他们输入这个PIN码。
7.单击打印按钮处理作业。
打印存储的作业
使用以下步骤打印打印机内存中存储的作业。
1.在打印机控制面板的主屏幕上,选择打印。
2.从作业存储中选择打印
3.选择“选择”,然后选择存储作业的文件夹的名称。
4.选择作业的名称。如果作业是私有或加密的,请输入PIN或密码。
5.要调整副本数量,请选择左下角的“副本数量”字段
UFC760BE141 3BHE004573R0141 变频器主板原厂进口 ABB
UFC760BE141 3BHE004573R0141 变频器主板原厂进口 ABB
following information provides procedures for creating and printing documents that are stored on the
printer. These jobs can be printed at a later time or printed privately.
● Create a stored job (Windows)
● Create a stored job (OS X)
● Print a stored job
● Delete a stored job
● Information sent to printer for Job Accounting purposes
Create a stored job (Windows)
Store jobs on the printer for private or delayed printing.
NOTE: The print driver might look diƫerent than what is shown here, but the steps are the same.
1. From the software program, select the Print option.
2. Select the printer from the list of printers, and then select Properties or Preferences (the name varies for
diƫerent software programs).
NOTE: The name of the button varies for diƫerent software programs.
NOTE: To access these features from a Windows 8 or 8.1 Start screen app, select Devices, select Print,
and then select the printer.
62 Chapter 4 Print ENWW
3. Click the Job Storage tab.
4. Select a Job Storage Mode option.
● Proof and Hold: Print and proof one copy of a job, and then print more copies.
● Personal Job: The job does not print until you request it at the printer control panel. For this jobstorage mode, you can select one of the Make Job Private/Secure options. If you assign a personal
identiƭcation number (PIN) to the job, you must provide the required PIN at the control panel. If you
encrypt the job, you must provide the required password at the control panel. The print job is deleted
from memory after it prints and is lost if the printer loses power.
● Quick Copy: Print the requested number of copies of a job and store a copy of the job in the printer
memory so you can print it again later.
● Stored Job: Store a job on the printer and allow other users to print the job at any time. For this jobstorage mode, you can select one of the Make Job Private/Secure options. If you assign a personal
identiƭcation number (PIN) to the job, the person who prints the job must provide the required PIN at
the control panel. If you encrypt the job, the person who prints the job must provide the required
password at the control panel.
5. To use a custom user name or job name, click the Custom button, and then enter the user name or the job
name.
Select which option to use if another stored job already has that name:
● Use Job Name + (1-99): Append a unique number to the end of the job name.
● Replace Existing File: Overwrite the existing stored job with the new one.
6. Click the OK button to close the Document Properties dialog box. In the Print dialog box, click the Print
button to print the job.
7. For information about how to print the job, see the topic for "Print a stored job."
ENWW Store print jobs on the printer to print later or print privately 63
Create a stored job (OS X)
Store jobs on the printer for private or delayed printing.
1. Click the File menu, and then click the Print option.
2. In the Printer menu, select the printer.
3. By default, the print driver displays the Copies & Pages menu. Open the menus drop-down list, and then
click the Job Storage menu.
4. In the Mode drop-down list, select the type of stored job.
● Proof and Hold: Print and proof one copy of a job, and then print more copies.
● Personal Job: The job does not print until someone requests it at the printer control panel. If the job
has a personal identiƭcation number (PIN), provide the required PIN at the control panel. The print job
is deleted from memory after it prints and is lost if the printer loses power.
● Quick Copy: Print the requested number of copies of a job and store a copy of the job in the printer
memory to print it again later.
● Stored Job: Store a job on the printer and allow other users to print the job at any time. If the job has a
personal identiƭcation number (PIN), the person who prints the job must provide the required PIN at
the control panel.
5. To use a custom user name or job name, click the Custom button, and then enter the user name or the job
name.
Select which option to use if another stored job already has that name.
● Use Job Name + (1-99): Append a unique number to the end of the job name.
● Replace Existing File: Overwrite the existing stored job with the new one.
6. If you selected the Stored Job or Personal Job option in step 3, you can protect the job with a PIN. Type a 4-
digit number in the Use PIN to Print ƭeld. When other people attempt to print this job, the printer prompts
them to enter this PIN number.
7. Click the Print button to process the job.
Print a stored job
Use the following procedure to print a job that is stored in the printer memory.
1. From the Home screen on the printer control panel, select Print.
2. Select Print from Job Storage
3. Select Choose, and then select the name of the folder where the job is stored.
4. Select the name of the job. If the job is private or encrypted, enter the PIN or password.
5. To adjust the number of copies, select the number of copies ƭeld in the bottom-left corner of the screen.
Use the keypad to enter the number of copies to print.
6. Select Print to print the job.
64 Chapter 4 Print ENWW
Delete a stored job
When a new job is stored in the printer memory, the printer overwrites any previous jobs with the same user and
job name. If a job is not already stored under the same user and job name, and the printer needs additional
space, the printer might delete other stored jobs starting with the oldest. To change the number of jobs that the
printer can store, complete the following procedure:
1. From the Home screen on the printer control panel, open the Settings menu.
2. Open the following menus:
● Copy/Print or Print
● Manage Stored Jobs
● Temporary Job Storage Limit
3. Use the keypad to enter the number of jobs that the printer stores.
4. Select Done to save the setting.
Use the following procedure to delete a job that is stored in the printer memory.
1. From the Home screen on the printer control panel, select Print.
2. Select Print from Job Storage.
3. Select Choose, and then select the name of the folder where the job is stored.
4. Select the name of the job. If the job is private or encrypted, enter the PIN or password.
5. Select the Trash icon to delete the job.
Information sent to printer for Job Accounting purposes
Printing jobs sent from drivers on the client (e.g., PC) may send personally identiƭable information to HP’s
Printing and Imaging devices. This information may include, but is not limited to, user name and client name
from which the job originated that may be used for job accounting purposes, as determined by the Administrator
of the printing device. This same information may also be stored with the job on the mass storage device (e.g.,
disk drive) of the printing device when using the job storage feature.
ENWW Store print jobs on the printer to print later or print privately 65
Mobile printing
Introduction
HP oƫers multiple mobile and ePrint solutions
UFC760BE141 3BHE004573R0141 变频器主板原厂进口 ABB
Copyright ©2019-2022 瑞昌明盛自动化设备有限公司 版权所有 赣ICP备2021006016号