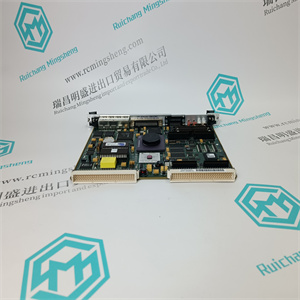
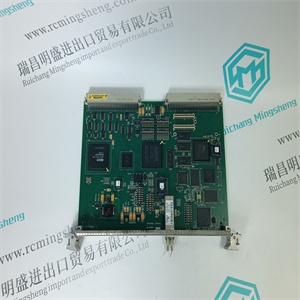
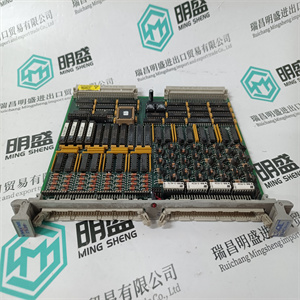
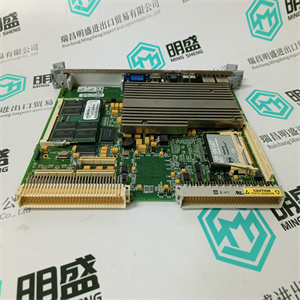
GDC780BE21 3BHE004468R0021 高压变频器主板 ABB
PFEA113-20的金属底部连接到金属DIN导轨,用作
张力电子接地连接器。
这是为了确保内部逻辑和EMI抗扰度的良好接地连接,以及
电子设备的射频发射。
DIN导轨必须与机柜的PE(保护接地)良好连接。
为了达到佳的耐腐蚀性,DIN导轨应镀铬,以便
例如,黄色铬被处理。使用星形垫圈和用于将导轨固定到安装板的每个螺钉。
为了将DIN导轨固定到安装板上,小螺钉直径为5 mm
螺钉之间的大距离为100 mm。
DIN导轨35 x 7.5mm(EN 50022-35x7.5或同等标准)
毫米[英寸]
张力电子PFEA113,用户手册
2.4.3节接地
3BSE029382R0101版本C 2-7
2.4.3接地
为了无故障运行,必须正确接地。请注意以下事项:
•如果自由(无屏蔽)长度超过0.1米(4英寸),则单独的电源对
信号导线必须单独绞合
•外部保护接地(PE)电缆必须连接到其中一个接地棒螺钉上
夹具。
•所有电缆屏蔽必须连接到接地棒和屏蔽长度
连接必须小于50毫米(2英寸)。
注
电缆屏蔽层只能在一端接地。
•由于测量系统的信号接地连接至
张力电子装置,连接到控制系统的系统的输入
不得接地。互连测量系统和
实现佳功能的系统如图2-6和图2-7所示。
图2-6.通过绝缘或差动输入连接到系统
图2-7.通过单独的绝缘放大器连接到系统
+
0V-
PFEA113
0V
0V
0V
+
- +
PFEA113
张力电子PFEA113,用户手册
二章安装
2-8 3 BSE029382R0101版本C
2.5安装MNS选择落地柜
2.5.1一起安装机柜
如果机柜要相互安装,则使用附带的螺钉/螺栓套件。四个M8螺钉,
在角铰链和六个M6螺钉中的垫圈和螺母分别约为Z1=500、Z2=1000、Z3=500和Z4=1000,
Z3=距地面1500 mm高度,见图2-8。将M8螺钉拧紧至大20 Nm
M6螺钉的大扭矩为10 Nm。
图2-8.将机柜安装在一起-螺钉位置
2.5.2将机柜安装到地板上
将机柜固定到地板上时,使用四个或六个M12螺钉,如图2-9所示,一个
在一排机柜中一个左侧机柜的每个角落,拧紧以下机柜:
右侧各有两个螺钉。底角铰链具有孔,
直径为14毫米(0.6英寸)。这些孔允许您在孔后调整机柜位置
在地板上钻孔。如果需要钻孔,确保没有灰尘或其他异物进入
机柜中的设备。请注意机柜与墙壁之间的小距离,以及
天花板在地板和机柜底部之间使用垫圈将机柜地板平齐成
水平位置。
张力电子PFEA113,用户手册
2.5.3节空间要求
3BSE029382R0101版本C 2-9
2.5.3空间要求
机柜的外形尺寸如中的尺寸图所示
附录A.7图纸。
以下规则适用于机柜的定位和定位:
•机柜顶面与梁顶、拱腹之间的距离,或
通风管道等必须至少为250 mm。如果电缆从上方进入,则该距离为
增加到1000mm。
•机柜后部和墙壁之间必须有至少40 mm的间隙,
以及在柜体的侧面和墙壁之间。
•允许带铰链的框架或外部封装的门完全打开,无需
挂在相邻墙壁上,与墙壁的距离必须增加到500 mm
框架铰链侧(左侧)或车门铰链侧(右侧)300 mm。
•机柜前必须至少有1米的自由空间。必须有可能:
完全打开门,以免限制退房和服务
GDC780BE21 3BHE004468R0021 高压变频器主板 ABB
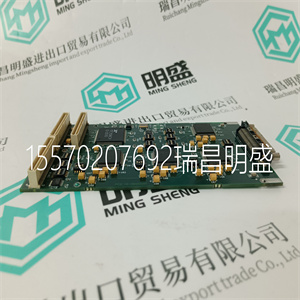
GDC780BE21 3BHE004468R0021 高压变频器主板 ABB
The metal bottom of PFEA113-20 connects to the metallic DIN-rail which serves as the
Tension Electronics earth connector.
This is to ensure a good earth connection both for internal logic and for the EMI immunity and
RF emission of the electronics.
The DIN-rail must have a good connection to the PE (Protective Earth) of the cabinet.
To achieve the best possible corrosion resistance, DIN-rails should be chromium plated, for
instance, yellow chromium treated. Use star washers with each screw used to fasten the DINrail to the mounting plate.
To fasten the DIN-rail onto the mounting plate, the minimum screw diameter is 5 mm and the
maximum distance between screws is 100 mm.
DIN-rail 35 x 7.5 mm (EN 50022-35x7.5 or equivalent)
mm [inches]
Tension Electronics PFEA113, User Manual
Section 2.4.3 Earthing
3BSE029382R0101 Rev C 2-7
2.4.3 Earthing
For trouble free operation, the earthing must be properly done. Note the following:
• If the free (unscreened) length exceeds 0.1 m (4 in.) the individual pairs of power
and signal conductors must be twisted separately
• The external protective earth (PE) cable must be attached to one of the earthbar screw
clamps.
• All the cable screens have to be connected to the earth bar and the length of the screen
connection must be less than 50 mm (2 in.).
NOTE
The cable screens must be earthed at one end only.
• Since the signal earth of the measurement system is connected to the chassis earth of
the tension electronics, the input of a superior system connected to the control system
must not be earthed. The best ways of interconnecting the measurement system and a
superior system to achieve optimal function are shown in Figure 2-6 and Figure 2-7.
Figure 2-6. Connection to a superior system with an insulated or differential input
Figure 2-7. Connection to a superior system through a separate insulation amplifier
+
0V -
PFEA113
0V
0V
0V
+
- +
PFEA113
Tension Electronics PFEA113, User Manual
Chapter 2 Installation
2-8 3BSE029382R0101 Rev C
2.5 Installing MNS Select Floor Cabinet
2.5.1 Mounting Cabinets Together
If cabinets are to be mounted to each other use the included screw/bolt kit. The four M8 screws,
with washers and nuts, in the angle hinges and six M6 screws at about Z1=500, Z2=1000,
Z3=1500 mm height from the floor, see Figure 2-8. Tighten the M8 screws to 20 Nm maximum
and the M6 screws to 10 Nm maximum.
Figure 2-8. Mounting Cabinets together - Screw Position
2.5.2 Mounting Cabinets to the Floor
When fixing the cabinet to the floor use four or six M12 screws where Figure 2-9 indicates, one
at each corner in the first left hand cabinet in a row of cabinets and screw the following cabinets
with two screws each at the right hand side. The bottom angle hinges features holes,
14 mm (0.6”) in diameter. These holes permit you to adjust the cabinet location after holes are
drilled in the floor. If drilling is necessary, make sure that no dust or other foreign matter enters
the equipment in the cabinet. Please notice the minimum distances from cabinet to walls and
ceiling. Use washers between the floor and the cabinet bottom to level the cabinet floor into a
horizontal position.
Tension Electronics PFEA113, User Manual
Section 2.5.3 Space Requirements
3BSE029382R0101 Rev C 2-9
2.5.3 Space Requirements
The overall dimensions of the cabinet are shown in a dimension diagram in
Appendix A.7 Drawings.
The following rules apply to locating and positioning of the cabinet:
• The distance between the top surface of the cabinet and the roof, soffit of a beam or
ventilation duct etc. must be at least 250 mm. If cables enter from above, this distance is
increased to 1000 mm.
• There must be a clearance of at least 40 mm between the rear of the cabinet and the wall,
and between the sides of the cabinet and the wall.
• To permit a frame with hinge, or a door to an outer encapsulation to open fully without
catching on the adjacent wall, the distance to the wall must be increased to 500 mm on the
hinge side (left) of the frame, or 300 mm on the hinge side (right) of the door.
• There must be at least 1 meter of free space in front of the cabinet. It must be possible to
open the door completely, in order not to restrict access for check-out and servici
GDC780BE21 3BHE004468R0021 高压变频器主板 ABB