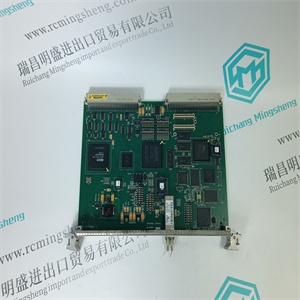
AKM42G-ANCNGBB0 ANCNGBB0 伺服电动机 Kollmorgen
使用单个称重传感器进行测量
在某些情况下,仅在一个传感器上安装一个称重传感器即可测量张力
卷的末尾。
F、 6.1常见和简单的解决方案
明显和简单的解决方案是水平安装,腹板均匀分布
并以辊为中心。
只要辊子两端支撑,第F.5节中给出的计算结果相同
有效的
注
单个称重传感器测量的精度在很大程度上取决于:
可以确定力的中心。由于横向应力
分布通常有些不均匀,这不容易做到。称重传感器
然而,将产生稳定和可重复的测量。
图F-2.横向应力分布
张力电子PFEA113,用户手册
第F.6.2节:腹板未位于辊中心时的力计算
3BSE029382R0101版本C F-7
F、 6.2腹板不在辊中心时的力计算
当腹板未居中时,使用以下计算进行水平和倾斜安装
在滚动。
称重传感器上施加的力将与张力之间的距离成比例
中心和称重传感器中心线。
计算程序:
1.水平安装还是倾斜安装?
2.计算FR和FRT,见第F.5节
3.使用以下等式:
单称重传感器的FR=
单称重传感器的FRT=
单称重传感器的FRtot=单称重传感器FR+单称重传感器FRT
哪里:
L=称重传感器中心线与相对轴承中心线之间的距离
a=皮重中心和称重传感器中心线之间的距离
b=拉力中心和称重传感器中心线之间的距离
b
一
L
皮重力中心
称重传感器
PFCL 201
张力中心
FR
L b——
L -----------
次登记税
洛杉矶——
L -----------
张力电子PFEA113,用户手册
附录F PFCL 201-称重传感器安装设计
F-8 3BSE029382R0101 C版
F、 7.安装称重传感器
F、 7.1准备工作
通过检查必要的文件和材料,及时准备安装
可用,如下所示:
•安装图纸和本手册。
•标准工具、扭矩扳手和仪器。
•防锈,如果对机加工表面进行额外保护。
例如,选择TECTYL 511(Valvoline)或FERRYL(104)。
•用于锁定固定螺钉的锁定液(中等强度)。
•表F-1和表F-2中列出的用于固定称重传感器的螺钉,以及用于
轴承箱等。
•称重传感器、转接板、轴承箱等。
F、 7.2安装
以下说明适用于典型的安装布置。可以允许变化,
只要符合第F.4节的要求。
1.清洁基础和其他安装表面。
2.将下部转接板安装到称重传感器上。将螺钉拧紧至中规定的扭矩
表F-1或表F-2,并用锁定液锁定。
3.将称重传感器和下部转接板安装到基础上,但不要完全拧紧
螺钉。
4.将上转接板安装到称重传感器上,拧紧至表F-1中规定的扭矩,或
表F-2,并应用锁定液。
5.将轴承箱和辊安装到上转接板上,但不要完全拧紧
螺钉。
6.调整称重传感器,使其相互平行并与轴向一致
辊的方向。拧紧地脚螺钉。
7.调整辊,使其与称重传感器的纵向成直角。
拧紧上部适配器板中的螺钉。
8.对任何不防锈的机加工表面进行防锈保护。
AKM42G-ANCNGBB0 ANCNGBB0 伺服电动机 Kollmorgen

AKM42G-ANCNGBB0 ANCNGBB0 伺服电动机 Kollmorgen
ation for Measurement with a Single Load Cell
In some cases, it is sufficient to measure the tension with only a single load cell mounted at one
end of the roll.
F.6.1 The Most Common and Simple Solution
The most obvious and simple solution is horizontal mounting with the web evenly distributed
and centered on the roll.
As long as the roll is supported at both ends, the same calculations given in Section F.5 are
valid.
NOTE
The accuracy of a single load cell measurement is highly dependent on how well
the center of force can be determined. Since the cross-directional stress
distribution generally is somewhat uneven, this is not easily done. The load cell
will, however, produce a stable and repeatable measurement.
Figure F-2. Cross-directional stress distribution
Tension Electronics PFEA113, User Manual
Section F.6.2 Force Calculation when the Web is not Centered on the Roll
3BSE029382R0101 Rev C F-7
F.6.2 Force Calculation when the Web is not Centered on the Roll
Use the calculations below for horizontal and inclined mounting when the web is not centered
on the roll.
The applied force at the load cell will be proportional to the distance between the tension force
center and the load cell centerline.
Calculation procedure:
1. Horizontal or inclined mounting?
2. Calculate FR and FRT, see Section F.5
3. Use the following equations:
FR for single load cell =
FRT for single load cell =
FRtot for single load cell = FR for single load cell + FRT for single load cell
where:
L = Distance between load cell centerline and the opposite bearing centerline
a = Distance between tare force center and load cell centerline
b = Distance between tension force center and load cell centerline
b
a
L
Tare force center
Load cell
PFCL 201
Tension force center
FR
L b –
L -----------
FRT
L a –
L -----------
Tension Electronics PFEA113, User Manual
Appendix F PFCL 201 - Designing the Load Cell Installation
F-8 3BSE029382R0101 Rev C
F.7 Mounting the Load Cells
F.7.1 Preparations
Prepare the installation in good time by checking that the necessary documents and material are
available, as follows:
• Installation drawings and this manual.
• Standard tools, torque wrench and instruments.
• Rust protection, if additional protection is to be given to machined surfaces.
Choose TECTYL 511 (Valvoline) or FERRYL (104), for example.
• Locking fluid (medium strength) to lock fixing screws.
• Screws as listed in Table F-1 and Table F-2 to secure the load cell, and other screws for
bearing housings etc.
• Load cells, adapter plates, bearing housings, etc.
F.7.2 Mounting
The instructions below apply to a typical mounting arrangement. Variations may be allowed,
provided that the requirements of Section F.4 are complied with.
1. Clean the foundation and other mounting surfaces.
2. Fit the lower adapter plate to the load cell. Tighten the screws to the torque stated in
Table F-1 or Table F-2 and lock them with locking fluid.
3. Fit the load cell and the lower adapter plate to the foundation, but do not fully tighten the
screws.
4. Fit the upper adapter plate to the load cell, tighten to the torque stated in Table F-1 or
Table F-2, and apply locking fluid.
5. Fit the bearing housing and the roll to the upper adapter plate, but do not fully tighten the
screws.
6. Adjust the load cells so that they are in parallel with each other and in line with the axial
direction of the roll. Tighten the foundation screws.
7. Adjust the roll so that it is at right angles to the longitudinal direction of the load cells.
Tighten the screws in the upper adapter plate.
8. Apply rust protection to any machined surfaces that are not rust proof.
AKM42G-ANCNGBB0 ANCNGBB0 伺服电动机 Kollmorgen